> For the complete documentation index, see [llms.txt](https://acoservice.gitbook.io/acoservice-documentation/llms.txt). Markdown versions of documentation pages are available by appending `.md` to page URLs; this page is available as [Markdown](https://acoservice.gitbook.io/acoservice-documentation/for-members/profiles.md).
# Profiles
Saved cards, addresses and mailbox credentials — how to build a checkout profile, import and export AYCD files, and how the sensitive fields are protected.
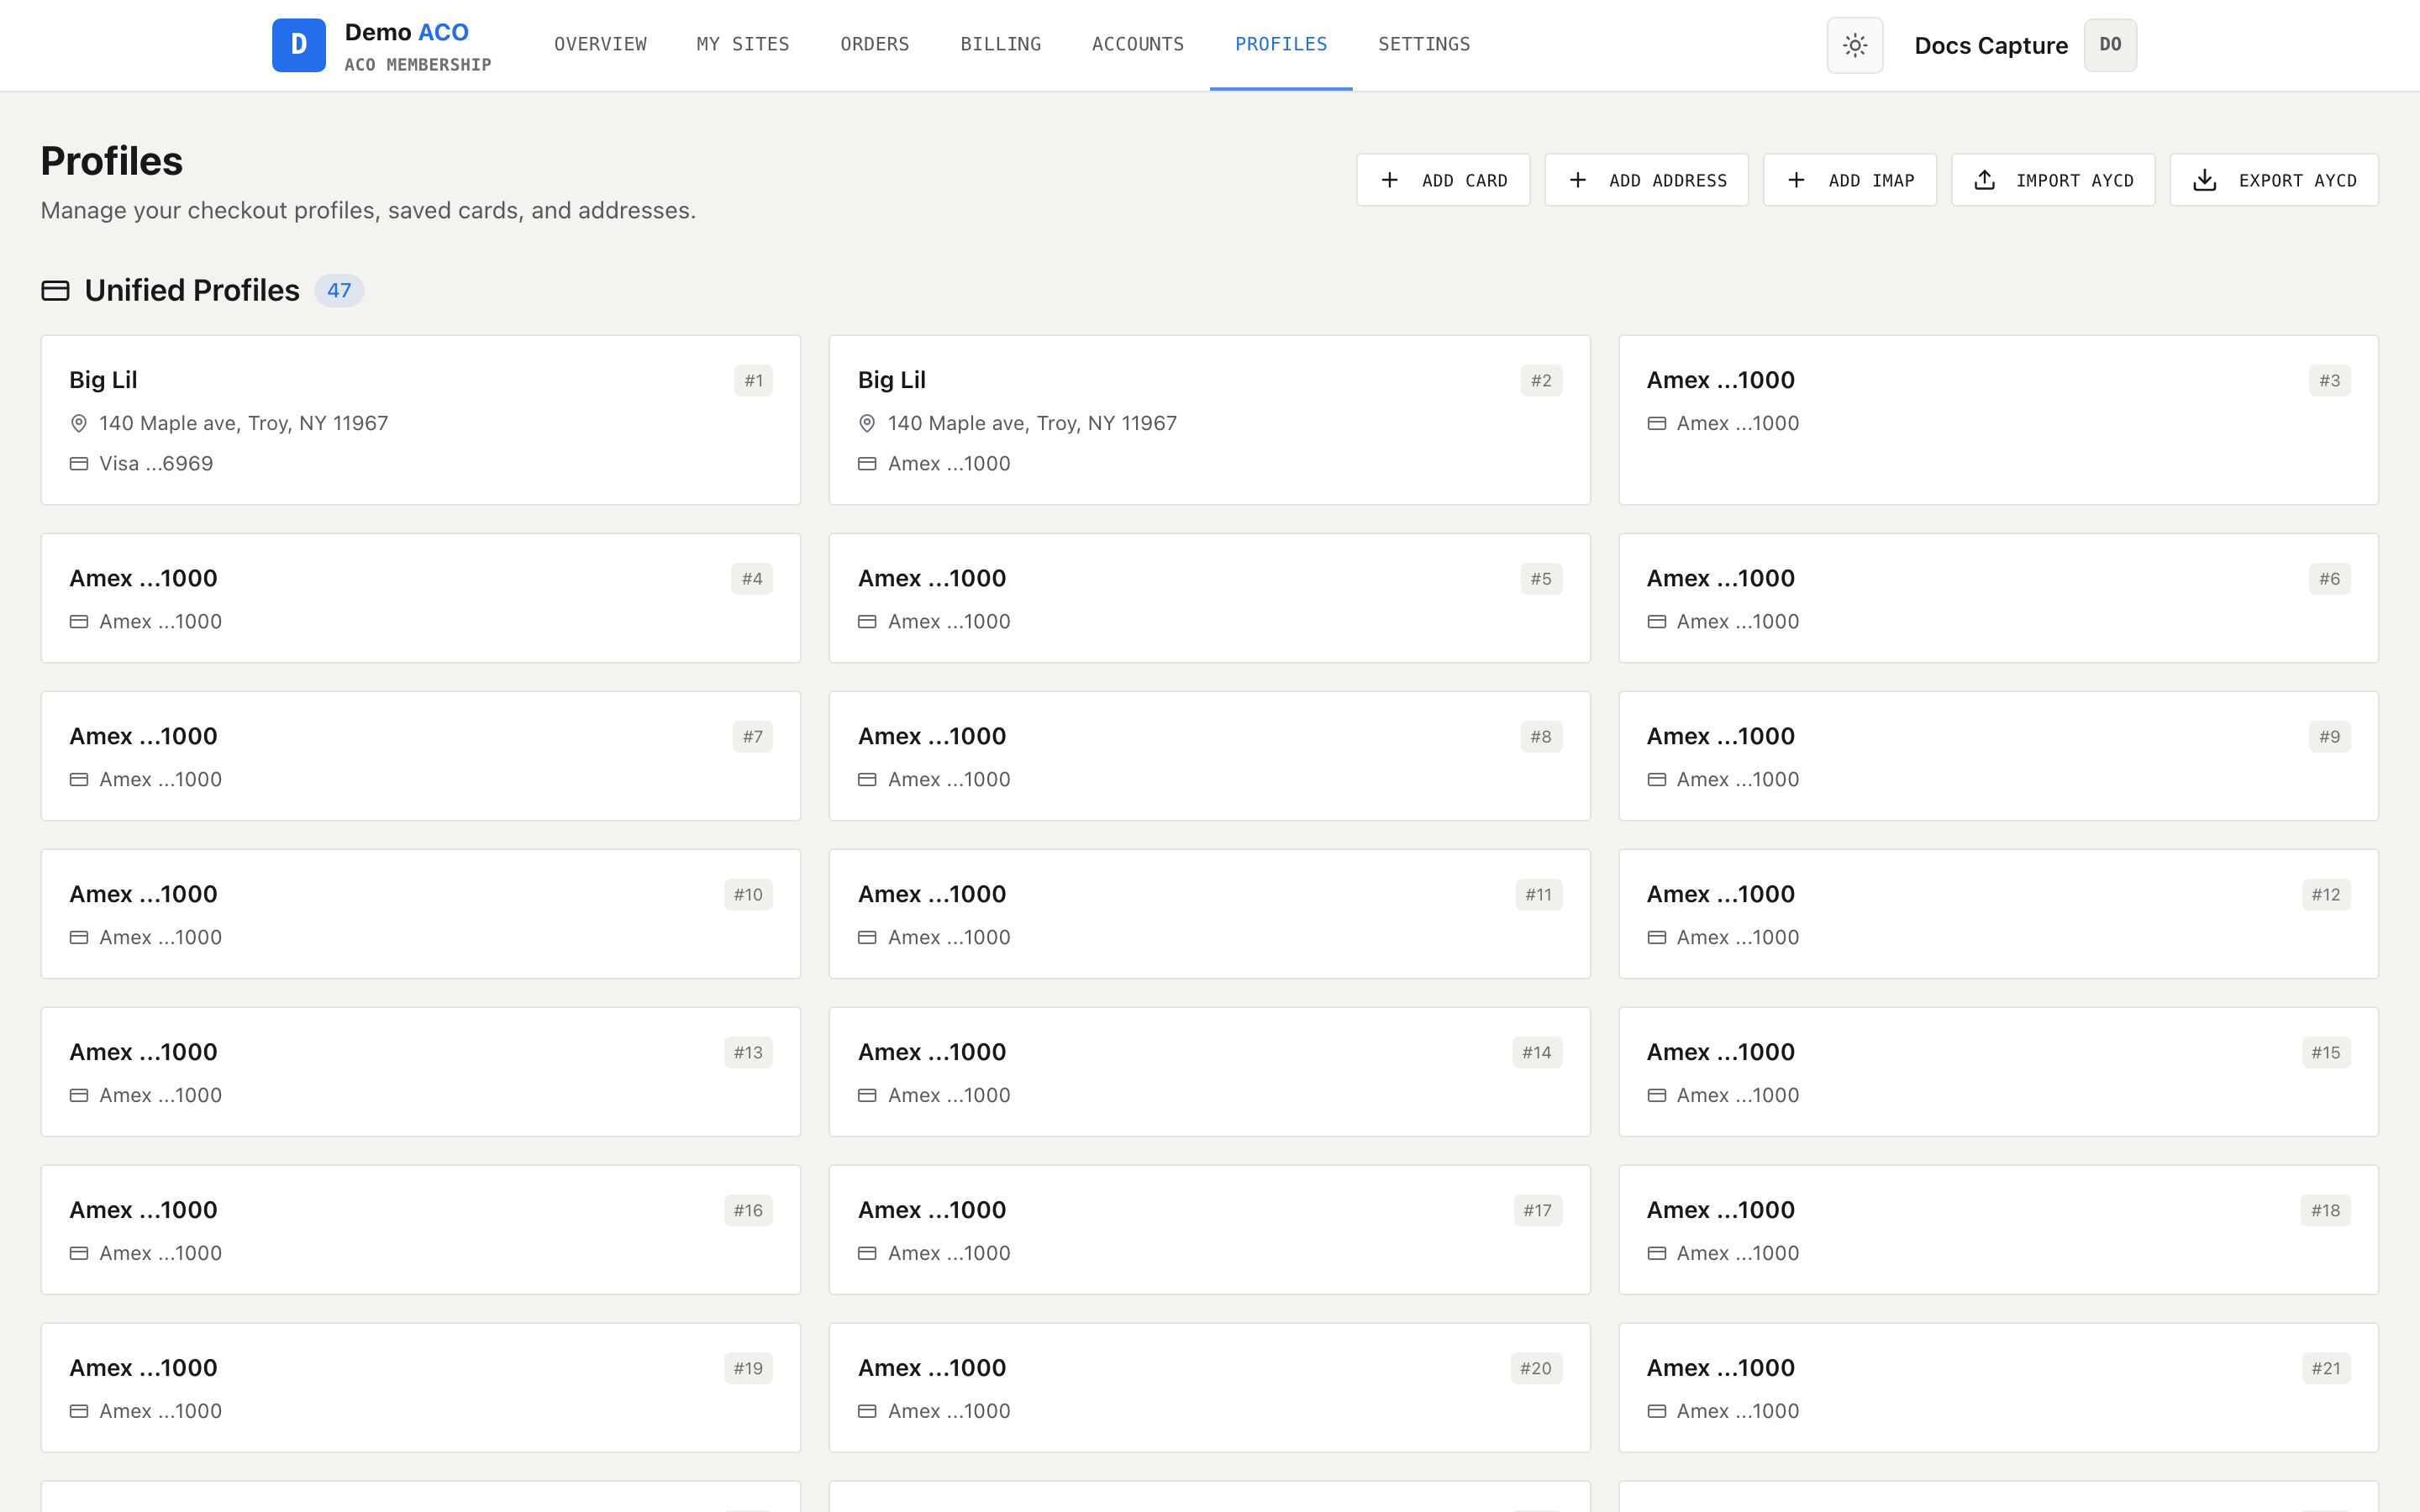
A checkout profile is the bundle of details a checkout needs: who is buying, where it ships, and what pays for it. ACO Service stores those pieces separately — **cards**, **addresses** and **IMAP credentials** — and pairs them into profiles when you export or submit a form.
Open **Profiles** in the member navigation. Everything here is your own — you add it yourself, and there is no admin screen that fills it in for you.
Each section carries a count badge. Cards and IMAP show six at a time, addresses four, with a "Show all" toggle underneath.
{% hint style="info" %}
If **Profiles** is missing from your navigation, your group has the feature turned off. The page is blocked, not just hidden — typing the URL in directly sends you back to Overview. Ask your admin.
{% endhint %}
## Cards
**Add Card** asks for three things:
| Field | Notes |
| ----------- | ----------------------------------------------------------------------- |
| Card Number | The brand icon appears in the field as soon as the number is recognised |
| MM/YY | Optional |
| CVV | Optional, four characters maximum |
The submit button stays disabled until the number is at least 13 digits and passes a checksum. The error text appears when you leave the field, not while you type: a short number reports `Card number too short`, and a number that fails the checksum reports `Invalid card number`. Neither is a call to your bank — it is arithmetic on the digits, so a typo is caught before it reaches a checkout.
Once saved, a card shows as its detected brand plus the last four digits. The full number is never displayed again anywhere in the interface.
Each card row has three actions: **Edit** (pencil), **Duplicate** (copy) and **Delete** (trash). Delete asks for confirmation first.
{% hint style="warning" %}
**Duplicate copies the number and brand only.** The expiry and CVV are not carried over — the copy comes back blank in both fields. Duplicate is for running the same card across several profiles; edit the copy afterwards if you need the expiry and CVV on it.
{% endhint %}
## Addresses
**Add Address** takes first and last name, street, an optional apt/unit line, city, state, zip, and country (defaulting to `US`). Everything except apt and country is required.
The same Edit / Duplicate / Delete actions apply. Duplicating an address copies only the name, street, city, state, zip and country — the apt/unit line and the email are not carried over. The email is the one that matters: it is the key that pairs addresses into a profile (see below), so a duplicate starts out unpaired.
### Jigging
Jigging is writing the same real address slightly differently so repeat orders to one house do not look identical to a retailer. The parcel still arrives; the string does not match the last one.
Each address card has two jig controls.
**Auto Jig** runs immediately — there is no preview, and the result is saved the moment it returns. It does two things:
* Line 1: abbreviates street types and compass directions in your street. `Street`→`St`, `Avenue`→`Ave`, `Boulevard`→`Blvd`, `Drive`→`Dr`, `Lane`→`Ln`, `Road`→`Rd`, `Court`→`Ct`, `Place`→`Pl`, `Terrace`→`Ter`, `Circle`→`Cir`, `Trail`→`Trl`, `Parkway`→`Pkwy`, `Highway`→`Hwy`, and `North`→`N` and the rest of the compass.
* Line 2: generates a unit line — one of `APT`, `BSMT`, `BLDG`, `DEPT`, `FL`, `KEY`, `LOT`, `LOWR`, `OFC`, `PH`, `PIER`, `RM`, `SLIP`, `SPC`, `STE` or `UNIT`, followed by a number between 1 and 399.
**AYCD Expression** opens a panel where you write the two lines yourself, in the same expression language AYCD's profile builder uses. Fill in *Line 1 Expression (Address)*, *Line 2 Expression (Apt/Unit)*, or both, press **Preview** to see one evaluation, then **Save** to store it. Save only appears after a preview, so you always see the shape of the output before it is kept.
The server evaluates these tokens:
| Token | Result |
| ----------------------- | -------------------------------------------------------------- |
| `%cWord1,Word2,Word3%` | One of the comma-separated words at random |
| `%c3%` | Three random letters |
| `%c1-3%` | Random letters, length between 1 and 3 |
| `%n5%` | Five random digits |
| `%n1-399%` | A random whole number between 1 and 399 |
| `%n10,20,30%` | One of the comma-separated numbers at random |
| `%n5++%` | A counter — returns its starting number on a single evaluation |
| `%fname%` / `%lname%` | A random first / last name |
| `%ffname%` / `%mfname%` | A random female / male first name |
| `%%` | A literal `%` |
Anything the evaluator does not recognise passes through unchanged, so a stray `%` will not break the line — it will just appear in your address.
A saved result shows on the address card as **Saved Jig**, and the most recent run shows as **Last Jig Result** until you leave the page.
{% hint style="info" %}
Jigging is applied to the **shipping** side only. When you export, the billing address goes out with your real, unjigged street — a jigged billing line fails address verification at the payment step.
{% endhint %}
## IMAP credentials
**Add IMAP** saves a mailbox login so a checkout can read confirmation mail. Pick a provider and the server is filled in for you:
| Provider | Server |
| ----------------- | ------------------------------ |
| Gmail | `imap.gmail.com` |
| Yahoo | `imap.mail.yahoo.com` |
| Outlook / Hotmail | `outlook.office365.com` |
| iCloud | `imap.mail.me.com` |
| AOL | `imap.aol.com` |
| Custom | You supply the server and port |
The server and port fields only appear on **Custom**; everywhere else the port is `993`. The password field is labelled **App Password** deliberately: on every provider in that list, your normal account password will not authenticate over IMAP. Generate an app-specific password in your mail provider's security settings and paste that.
An IMAP row carries **Edit** and **Delete** only — there is no Duplicate.
## Unified profiles
The **Unified Profiles** section at the top of the page is not a fourth thing you create — it is a preview of how your cards and addresses will be paired when you export. Each tile shows the name, the email, a shipping line and the card label.
The pairing rule matters, because there is no link between a card row and an address row in the data:
* Addresses are grouped by email address. Two addresses sharing one email are one profile — the first is billing, the second is shipping. An address with no email stands alone and serves as both.
* Cards are then handed out in the order you created them, one per profile, never reused.
* A card left over after every profile has one is exported on its own, so no payment detail is silently dropped.
The section is hidden entirely when you have nothing to pair yet.
## Importing from AYCD
**Import AYCD** takes a `.json` file exported from AYCD Toolbox — one profile or an array of them, in either the flat (`ShippingAddress1`, `CardNumber`) or nested (`shippingAddress`, `paymentDetails`) layout. Both are read.
Cards are deduplicated against what you already have by card number, so re-importing the same file will not give you the card twice. A green banner reports how many cards and addresses landed. If some entries were rejected you get a separate error toast with the count — a partial import is never reported as a clean one.
An unreadable or non-JSON file fails the whole import with a message saying so; nothing is half-written.
## Exporting to AYCD
**Export AYCD** downloads `profiles-aycd.json`, built from the pairing described above. It writes both the nested AYCD block and the older flat keys, so it opens in AYCD Toolbox and in anything already consuming the previous export format. Expiry and CVV are included, which means an export and a re-import round-trips without losing your payment details.
The button only appears once you have at least one card or address.
## How your data is stored
Everything sensitive on this page is encrypted before it reaches the database, field by field, with AES-256-GCM. Encryption is authenticated: a tampered or truncated value fails to decrypt rather than returning something plausible, and there is no plaintext fallback — if the key is missing the system refuses to read rather than handing back ciphertext.
| Encrypted at rest | Stored in the clear |
| -------------------------------------------------------------------------------------- | -------------------------------------------- |
| Card number, CVV | Card brand, expiry, the `Visa ...4242` label |
| Every address field: name, street, apt, city, state, zip, email, and both jigged lines | Country, address label |
| Mailbox address, mailbox password | Provider, server, port |
Nothing keeps a plaintext copy: a card number is decrypted only at the moment it is read back into the Profiles page or into a form submission.
### What a platform operator can see
If a platform operator uses "view as" to look at your account for support, the view is deliberately degraded:
| Field | What they see |
| ---------------- | ------------------------------------------------------------------- |
| Card number | Last four digits only |
| CVV | `•••` |
| Mailbox password | Empty |
| Addresses | In full — a support session that cannot see your address is useless |
Cards and mailbox credentials are also **read-only** in that mode: an impersonated session cannot add, edit or delete them. Addresses stay editable, since fixing a bad address is the reason the feature exists.
## Related
* [Forms](/acoservice-documentation/for-members/forms.md) — where saved cards and addresses get used, via **Use Saved**
* [Accounts](/acoservice-documentation/for-members/accounts.md) — retailer logins, stored separately from profiles
---
# Agent Instructions
This documentation is published with GitBook. GitBook is the documentation platform designed so that both humans and AI agents can read, navigate, and reason over technical content effectively. Learn more at gitbook.com.
## Querying This Documentation
If you need additional information that is not directly available in this page, you can query the documentation dynamically by asking a question.
Perform an HTTP GET request on the current page URL with the `ask` query parameter, and the optional `goal` query parameter:
```
GET https://acoservice.gitbook.io/acoservice-documentation/for-members/profiles.md?ask=&goal=
```
`ask` is the immediate question: it should be specific, self-contained, and written in natural language.
`goal` is optional and describes the broader end goal you are ultimately trying to accomplish on behalf of the user. GitBook uses it to tailor the answer towards what is most useful for that goal.
The response will contain a direct answer to the question and relevant excerpts and sources from the documentation.
Use this mechanism when the answer is not explicitly present in the current page, you need clarification or additional context, or you want to retrieve related documentation sections.